My Mom is the Coolest – A Mother’s Day Writing Activity
Finding simple ways to help my students create a meaningful gift for their mom (or mother-figures) is something that is always on my mind in May. With state testing and so many other things to wrap up, this is already a busy time. Over the years I’ve become pretty well-equipped to find ways to blend our curriculum with ways to help students make something they are proud of. That’s where this Mother’s Day writing craft comes in.

Today I want to share how I’ve used this writing activity to make a fun book for my students to take home for Mother’s Day without completely sacrificing my language arts block. I’ve included some links to my favorite resources, as well.
The links in this article are Amazon affiliate links. If you decide to use one of these links to purchase, I make a small commission on your purchase.
What’s included in this writing activity?
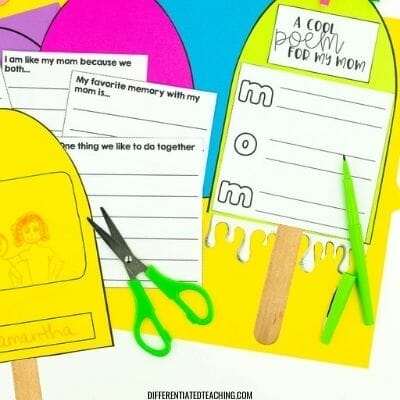
This Mother’s Day writing resource includes both a time-saving print & go format and a cut & paste option for more flexibility with young writers so you’ll have some options when deciding what will work best for your learners.
The download includes the following:
- Teacher Guide
- Brainstorming Pages
- Graphic Organizers
- Drafting Pages
- Full- or Half- Page Cut & Paste Template
- Full or Half-Page Print & Go Template
Going through the writing process
If you’ve got about a week for this project, I recommend working through the writing process as you create the final booklet. Here’s an overview of how I like to implement this project with learners.
1) Introducing the project
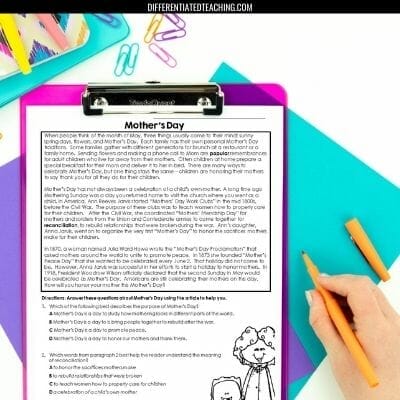
I really like to introduce this project by discussing the upcoming Mother’s Day holiday. Depending on my group and whether we’ve wrapped up our prep for state testing, I like to start out by reading a short passage about the history of the holiday and answering some questions.
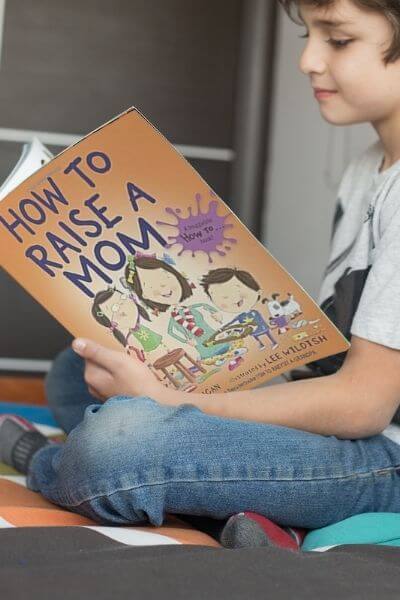
Other times we’ll read a fun picture book like My Mom has X-Ray Vision or How to Raise a Mom as an opening activity. I also like to leave these out after I read them so that students can borrow them during our free reading time.
Once we’ve done our intro activity, I ask them whether they’ve already got a gift ready for their mom. Nine times out of ten they don’t. That’s when I tell them we’re going to be working on a gift for their moms.
Note for Inclusivity: If I’ve got a kiddo who doesn’t have a mom in the picture, I make sure to have a conversation with them prior to introducing this lesson about how anyone can serve as a mother figure to us. We brainstorm who is someone who fills that role in their lives. I like to do this one-on-one with the student so that they don’t have to have uncomfortable conversations in front of peers. This also lets them be seen and supported.
I like to show my students my model copy of the final booklet before they begin. We spend some time talking about how carefully I worked to make it look nice. I point out how I colored neatly, took my time cutting, etc. This can be helpful when you’ve got friends who like to rush through their work because the knowledge that it is a gift for someone makes a big difference.
2) Generate Ideas for Writing
The final booklet can contain up to 6 different writing pages that cover narrative, descriptive, expository, and poetry writing.
However, even if the majority of my class creates the entire booklet, there are always a few students who struggle to get it done. That’s why I like to prioritize two pages – The Best Thing About My Mom and the MOM acrostic poem. Since either of these can be a stand-alone gift, it helps me make sure I’m covered no matter what.
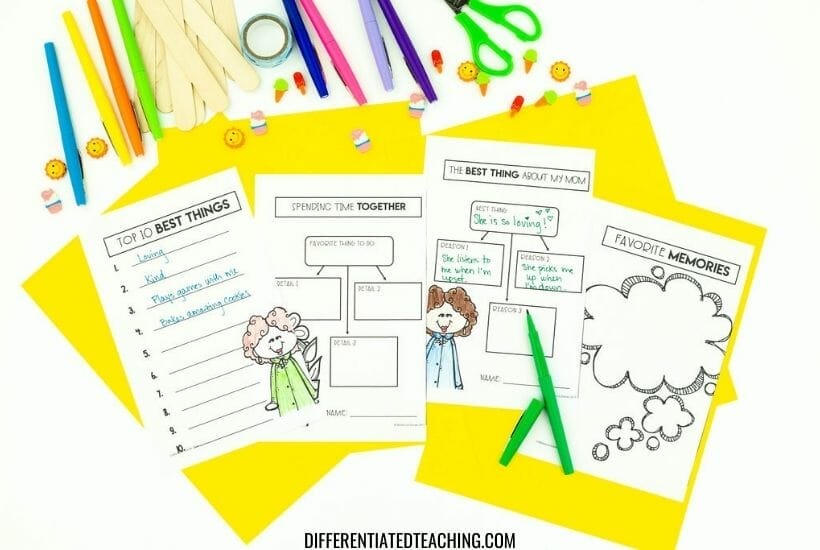
After I provide students with the first prompt, I start by modeling some ideas. Over the years I’ve learned that even with a topic as familiar as their own mom, students provide higher-quality responses if they’ve seen some models.
During this time we also discuss deep vs. shallow brainstorming. My goal is to eliminate words like “nice” and “pretty” and push my students to a deeper level of reflection. I give them the brainstorming sheet and 5-10 minutes to generate as many ideas as they can.
Differentiation Tip: A list of character traits can be helpful for this activity, especially for students who struggle with idea generation. You can find a free list of character traits in the freebie shared here.
When time is up, bring the group back together and give students a chance to share 1-2 items from their list with a partner. From there they can select on that they’d like to write about.
3) Organizing & Drafting the Mother’s Day Writing Piece
Once my students have selected the one thing they want to (or feel confident they can) write about, I introduce the graphic organizer.
Using the list I generated earlier, I like to have my students help be complete a copy of the organizer as a guided practice before they do it themselves.
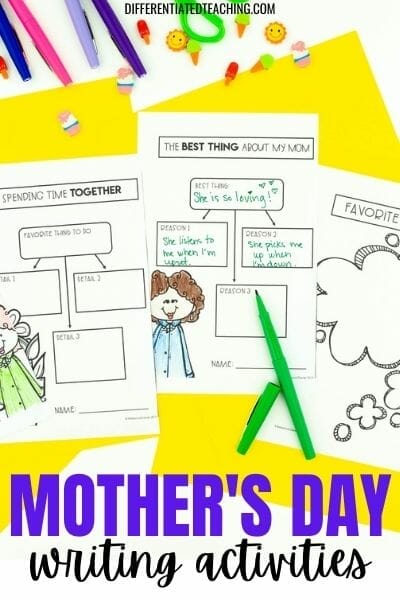
Once we’ve worked through this together, I give students their copy of the organizer and have them record what they want to make sure they include in their own writing. While they are working on that, I circulate around the room and help those students who I know struggle to get ideas on paper.
When it seems like students are nearly done, I bring the group back together to transition into the drafting process.
Again, I start by modeling how I use the organizer and begin to develop a paragraph from my ideas. I like to do this as a think-aloud so students hear me break down the process step-by-step. When I’m done, I hand out the drafting page and allow students to begin their own writing.
4) Edit, Revise, Repeat
Once the drafts are complete, I have students complete the editing process. We focus on capitalization and punctuation specifically.
After that we do some revision work. I like to have students look for words repeated too often and the introduction and conclusion for this particular prompt, but you can have students focus on any skills you’ve covered.
Once they’re done, editing and revising they can write their final draft and add an illustration. Then you’ll repeat this process for the other prompts you want to include.
Preparing the Book
Depending on which format you’ve used, you might only need students to cut out and staple their Mother’s Day Writing Book. However, if you chose the cut and paste version, your students will have a bit more work to do at this point. Here’s what needs to happen:
- Cut out the cover and back of the booklet. Have students write their name and draw a picture of themselves with their mom on the last page.
- Cut out the popsicle shaped pages and any text boxes or illustrations following the provided lines.
- Create a booklet and add a staple at the top to hold the pages together.
- Glue one illustration and writing piece to each inner page.
- If desired, allow students to carefully cut out and add the dripping piece to the bottom of their booklet.
- Glue a large popsicle stick to the back of the back cover.
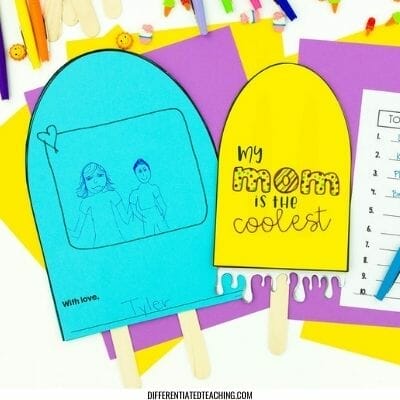
From there, you can hang these on a bulletin board to display them until it is time to send them home as gifts.
Where to get this Mother’s Day Writing Activity
If you’re ready to get started with this resource in your classroom, you can purchase it resource in my Teachers Pay Teachers shop or on my website.
If you’re looking for more great writing crafts check out these articles:


